Creating a Discord bot may seem harder than it is but when it comes to it there can be a lot that we can discuss and educate you on. While without understanding what a discord bot is and how to create it, we cannot dig deeper into the topic. So let me start by helping you understand what exactly a Discord bot is, and then let’s dig a little deeper into creating one. Worry not for I will be providing a brief explanation of the creation of a discord bot.
WHAT IS A DISCORD BOT?
When it comes to the question of what a discord bot is, let it be known that a discord bot is an artificial intelligence-driven tool that helps you with automating tasks on your discord server.
ADVANTAGES OF DISCORD BOT
Now that I have explained what a discord bit is, let me tell you how a discord bot can help your server. Discord bot really makes the whole work of building a community that is truly interesting to interact with and engage with, ease. Discord bots will moderate your discord server as they welcome new members so you don’t have to worry about having to add any newer members and when it comes to removing them, specifically those that try to ruin the atmosphere on the server, it takes responsibility in removing them on its own. Now you’re in light of the importance of a discord bot as it can be really useful for your server.
CREATION OF A DISCORD BOT
The will to create something only stems from understanding what that thing is and what are the uses of creating it in particular, now that I have helped you understand what a discord bot is and what are the advantages of creating a discord bot, let me come back to the main question, how to create a discord bot? You can create your discord bot in just 10 steps:
- CREATE A DISCORD ACCOUNT
There is no use in learning about discord bot or reading about the steps given below without creating a discord account, you can create a discord account using https://discord.com/ , the information that you would require in creation of a discord account is your email id and your date of birth.
- CLICK ON NEW APPLICATION
Once you are done with creating the discord account, the next step is to navigate to the developer portal https://discord.com/developers/applications. Here I am providing you with the link to the discord developer portal. And the application tab on this link.
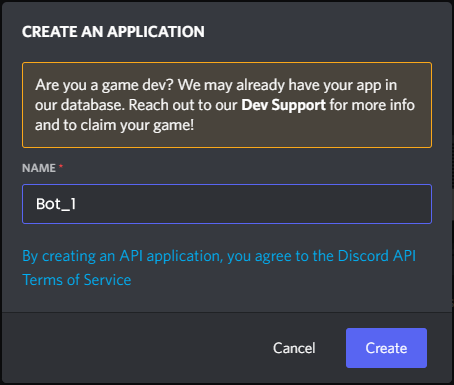
- NAMING THE APPLICATION
Once you are done with clicking on the new application, you can go ahead and name the application as you like, once you are done with that click on the “create” button. And now you will have your application created with a name of your choice.
- SELECT “Bot”
Once you are done with creating an application name, after clicking on the create button, you will be transferred to a page just like the one given below. You need to select the “bot” option on that page.

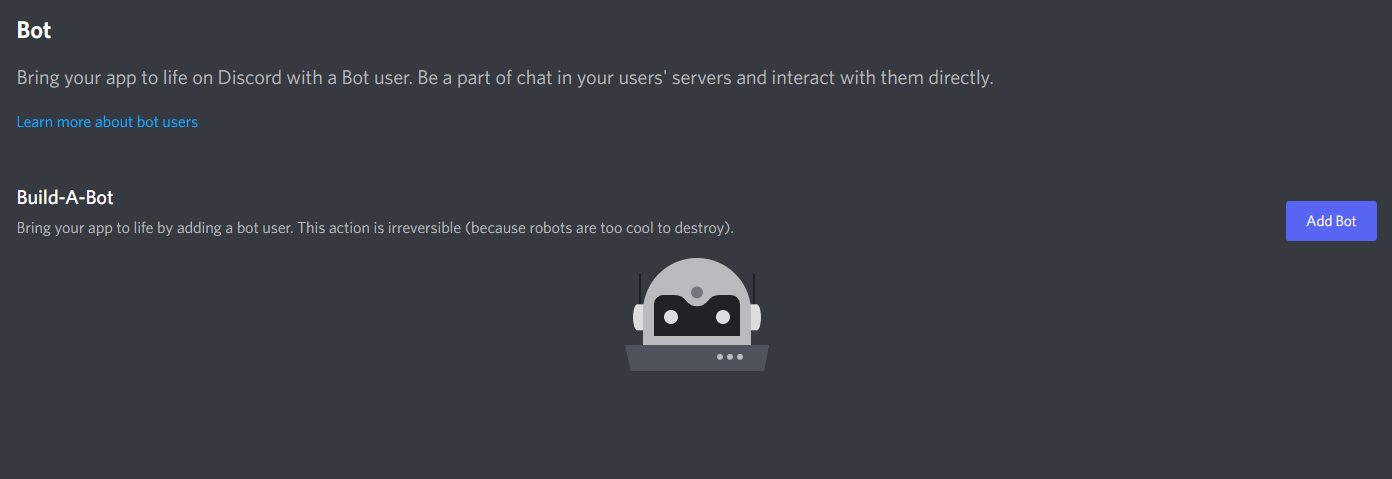
- CLICK ON “ADD BOT”
Once you are done with selecting the “bot” option, the next thing that you need to do on the next page is to click on ADD BOT, this will help you create new bot users by clicking on add bot.
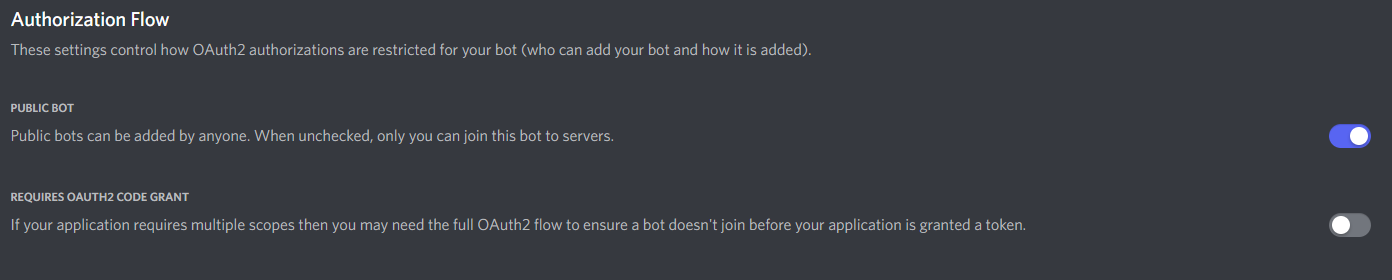
If you would like public users to be able to invite your bot to their server, you should always have the PUBLIC BOT option on the AUTHORIZATION FLOW, and you should always turn off the REQUIRED OAUTH2 CODE GRANT unless the service you are developing specifically requires it.
- COPY BOT TOKEN
Once you are done with the previous process, you will be provided with a bit token, don’t forget to copy that bot token, as it will appear only once while you are creating it. If you forget to copy the bot token, you will not be able to search for it again. You will have to regenerate a new bot token.
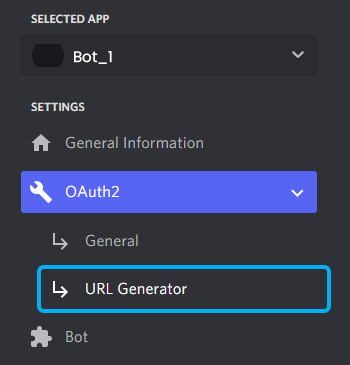
- NAVIGATE TO OAUTH2 URL GENERATOR TAB
Once you are done with copying the bot token, there will be an option called Oauth2. Once you find that you need to expand the OAuth2, you will come across two options one is general and another one is a URL generator. You need to select the URL generator
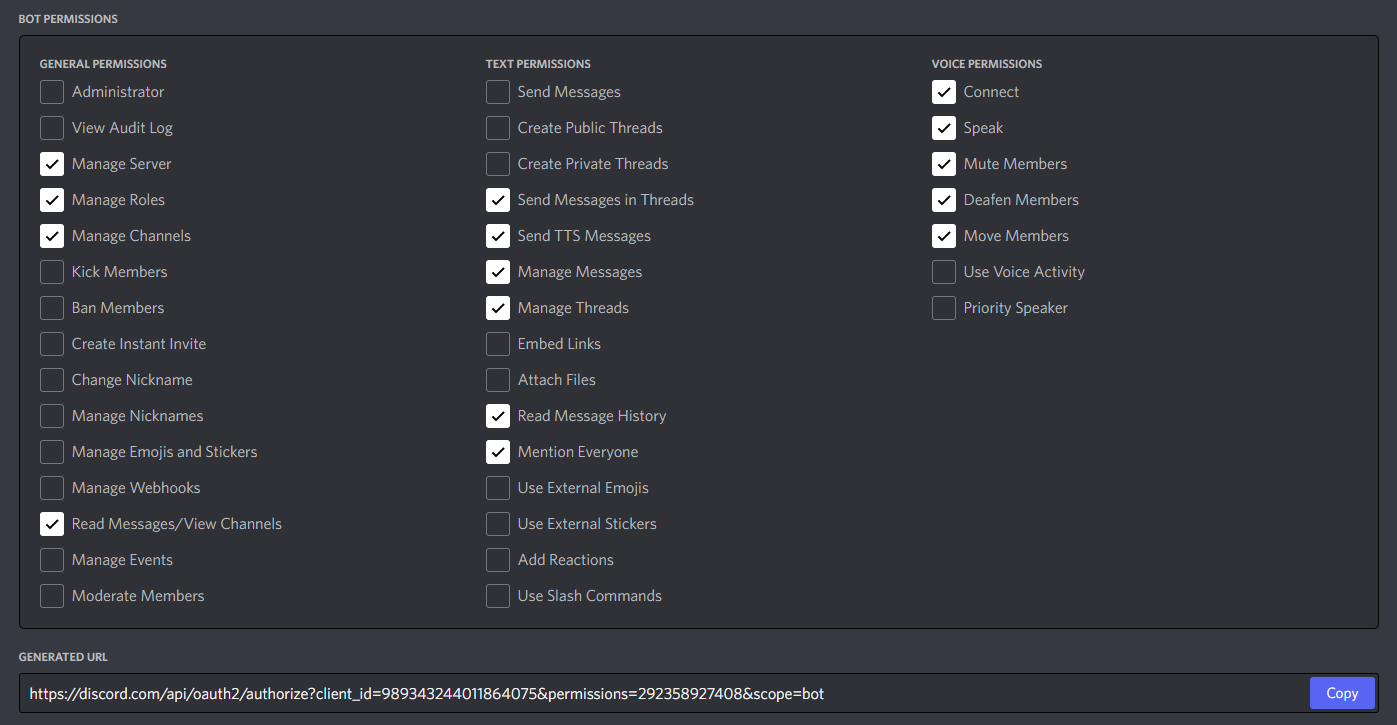
- TICK THE “BOT” CHECKBOX
The next step that you need to do is to tick on the “BOT” checkbox under the scope section.
- SET BOT PERMISSIONS & COPY THE URL GENERATOR
Once you are done ticking on the ‘BOT’ checkbox, then you need to scroll down and tick on the permissions required for your bot to function. Then you will be provided with the invite URL which will be auto-generated depending on the permission checkbox you click.
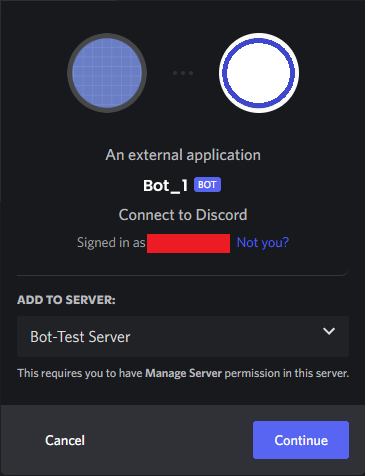
- PASTE THE BOT URL INTO THE BROWSER & INVITE IT TO YOUR SERVER
Once you are done with the previous step, paste the bot URL that you will be provided within the browser and invite it to your server.
You will be also provided an option to make one last change for you to check if the permissions are being doubled sure, if everything looks completely fine then click on authorize.
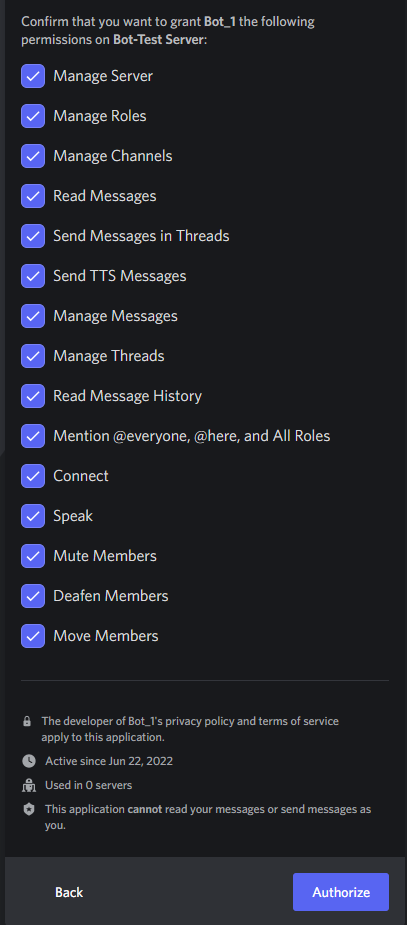
Congratulations now you are all set to have your own discord bot.